

Building With Game Blocks

Patrick O’Callaghan
Patrick is an animator, digital artist, and game designer based in the New Jersey tri state area. Graduating with an AAS in game design and a certificate of proficiency in animation from Mercer County Community College in 2017 and a BA in interactive multimedia with a focus in game design and animation from The College of New Jersey in 2021, Patrick’s work focuses on character design, modeling, and animation.
To follow up on any further developments and to check out some of my other work take a look at my thesis twitter and portfolio website:
https://programpat.wixsite.com/programpat
https://twitter.com/Pat_TCNJ_Thesis
Why Building Blocks?
Having the freedom to use your creativity to create whatever you can imagine has always been something that has attracted me. As a kid I grew up building with Lego and would spend hours building whatever came to mind. Even though as I grew older I chose to pursue 3D modeling and animation as my main focus of study, Lego and other forms of building applications and the unending possibilities of what you can make with them have always stuck with me and because of that that I chose to delve into an area that I am less acquainted with and make a building simulator in Unity as a learning opportunity and out of genuine interest.
What are the essentials needed for being able to build in a space?
First things first is placing a block!
While my experience with Unity mostly revolves around the aesthetic side of things, this project was much more of a coding project than anything else which was rather intimidating for me. Placing an object in a designated location was the first step towards building anything. After doing some research I decided to do this by using a raycast and layers to determine what was an area in which I could place something. Much like other forms of building in games the need arose for a preview to be shown so that users could see where the block was being placed. The preview was set up to only show up on surfaces that could be built on. To do this, the raycast was set to check that objects were on certain layers and only those layers would allow for a block to be placed. and with that I had a base to build upon and was on my way!

A preliminary version of the menu system working in game.
Now that I can place blocks what’s next?
Using different shapes and changing their orientation!
Being able to use different shapes rotate them in the right directions to fit your design is a pretty important part of any building simulator. These each presented their own set of challenges and required me to continue to learn new things such as being able to swap out the assigned prefab when pressing a button or accessing the rotation of an object and creating a function to have it rotate on a keyboard key command. Being able to change blocks required an interface to work with and assign game objects to various buttons within a menu. This had been my first time really working with the UI functions within Unity which was mostly just assigning buttons and giving them scripts to interact with the building script I was already using and then assigning various objects to those buttons. With rotation it was important to note that just simply rotating an object on its x or y axis yielded promising results until noticing that its rotation was based on the objects xyz axis, locking the rotation to the worlds x and y axis gave me the results I was looking for.
After getting the button swapping working I figured I could in theory use a similar process to swap the colors on the blocks as well.
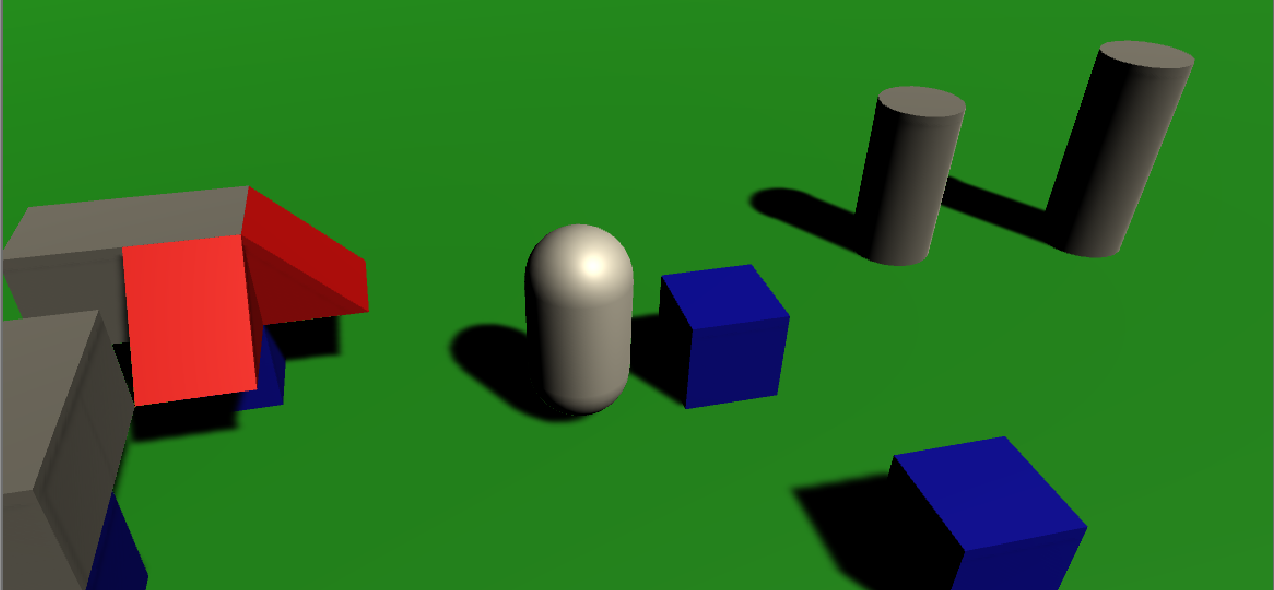
Spawning different types of objects with different colors and orientations.
Finally now that I could spawn things in a variety of configurations the last thing I felt that needed to be implemented was being able to remove blocks that I had previously placed within my scene. This was done using the same ray cast used to determine where to place the blocks but with a click of the right mouse button a function was called that would delete the object in contact with the ray cast rather than placing one.
This project was very informative for me and helped to better my understanding of coding in Unity, with the knowledge learned by working on this I plan to continue with this project in the future and build upon it further. Lastly I would like to thank my peers and faculty that helped me throughout this process.